Quick Introduction to HTML, SVG, and D3
HTML: Tags, Elements, and Attributes
Let's look at a basic HTML example:
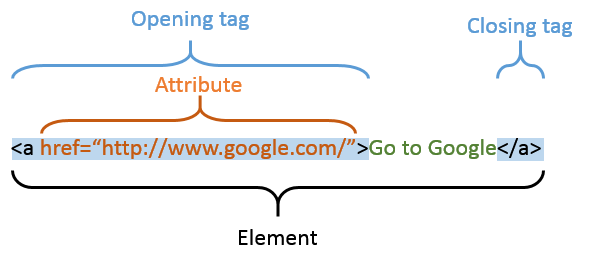
Before getting into the whole HTML document, let's look at one of the element to understand the syntax:

Tags
So let's break that down. For now, let's ignore the href=... part (Assuming it is transparent, so we have <a>).
We can find there're clearly a few words there: "Go to Google" But those words are wrapped in a <a>...</a>. Both of these are tags. The <a> is the opening tag, and the </a> is the closing tag (the slash makes it a closing tag.)
Elements
This text combined with the <a> and the </a> is an element. In this case, the element type is an a, which is an anchor element that is usually used to create links in the document. This element tells a web browser that everything between the opening and closing tag is link text, so the browser can apply the necessary style. By default, this typically means the text will be underlined.
Attributes
Inside the opening tag of any element can be an attribute, and the href=... we ignore above is exactly an attribute of the a element.
An attribute is used to give the element some special properties, which are aptly named attributes. These are generally key/value pairs. In this case, href (they key) contains the links destination (the value).
These are the basic building blocks of HTML.
Core HTML Structure
Now, we can look at the whole HTML document. Every current webpage will have at least 5 key elements: <!DOCTYPE html>, <html>, <head>, <title>, and <body>. Here's an example:
<!DOCTYPE html>
<html>
    <head>
        <title>This is my favorite page</title>
    </head>
    <body>
        <p>This is the body of our page!</p>
    </body>
</html>
<!DOCTYPE html>is always the first element on a page, and tells the browser that this page is HTML5. Notice that it does not have a closing tag! This is the first element we have seen like this, but there are several more.<html>is the wrapper around an html document.<head>is a special section that is used for key properties of the document.<title>is the title of the document. Since it does not change the page structure, it appears only in the<head>.<body>is the core of the document itself. All of the visible HTML you see will appear within the<body>tag.
Document Object Model (DOM)
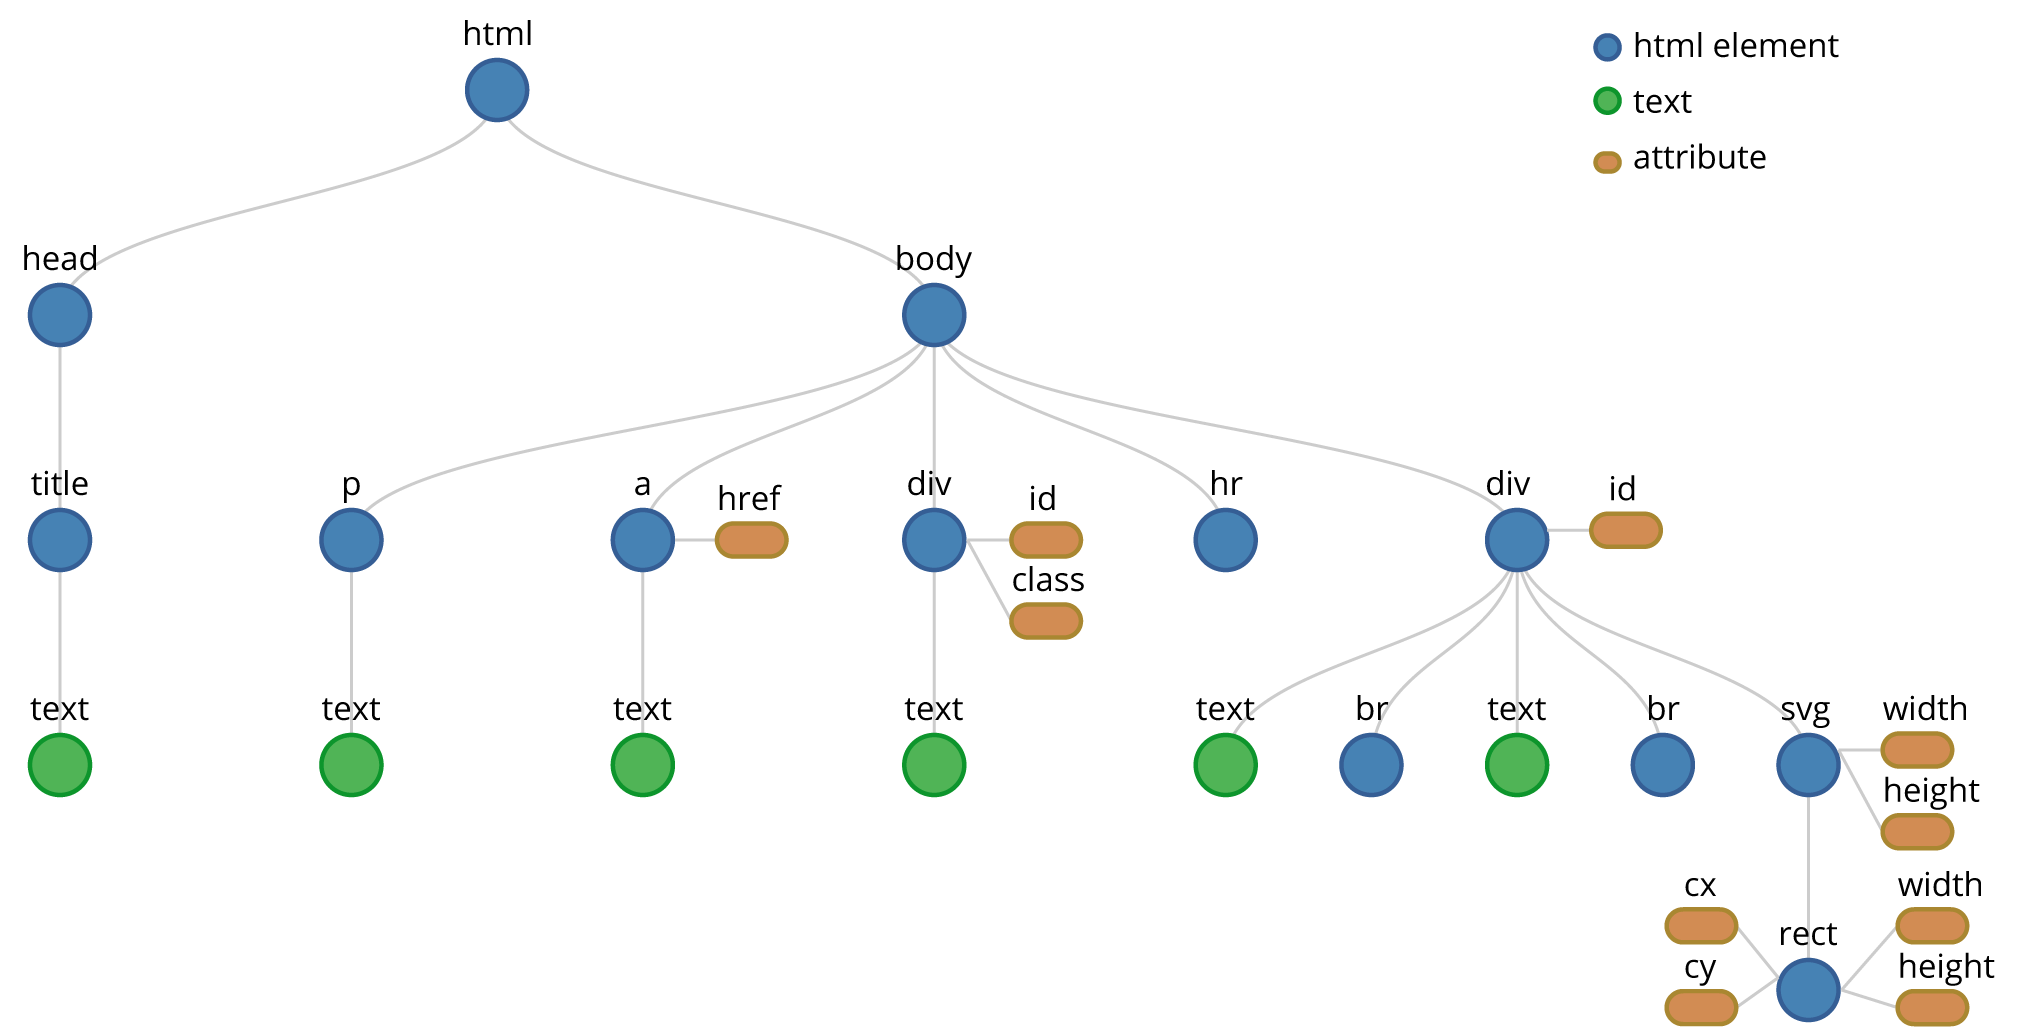
When browsers load a HTML document, it will actually parse it into the Document Object Model (DOM). Like the example we have seen at beginning will be parsed into something like this:
 The DOM is a hierarchical representation that browsers use to render what we can see in a page. This is also what D3 is actually manipulating. You can learn more details about DOM in the MDN introduction to the DOM document.
If you want to visualize the DOM of a HTML file, you can use d3.domVisualizer. (The DOM visualization will be a little bit different from the illustration above, but it should still be useful.)
SVG
SVG is a language very similar to HTML, but unlike HTML is specifically meant for creating graphics. Thankfully, it can live within HTML as a special element. The SVG element. This would look like this:
<svg width="100" height="100">
    ... SVG elements ...
</svg>
Notice that this has two attributes for width and height. It is important to explicitly specify both of these attributes and give the SVG element a size. Unlike HTML elements, it will not auto-adjust the size with the content inside of it. In this case, it will be 100 pixels wide and 100 pixels tall.
So two of the key elements in SVG that you'll use are the circle and the rect.
Bar Attributes (The most important ones)
| Attribute Name | Description |
|---|---|
| x | X coordinate |
| y | Y coordinate |
| width | Width of rectangle |
| height | Height of rectangle |
| fill | Fill color name or HTML RGB notation |
| stroke | Stroke/Outline color name or HTML RGB notation |
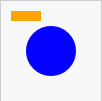
So to insert an SVG bar, the full code in HTML would look like this:
<svg width="100" height="100">
    <rect x="10" y="10" width="30" height="10" fill="orange" />
</svg>
Adding Elements By Hand
Now it's your turn. Let's add a blue circle to the SVG. The circle should be centered at (50,50) and should have a radius of 25 pixels.
Here's a table of some of the attributes:
| Attribute Name | Description |
|---|---|
| cx | X coordinate of the center |
| cy | Y coordinate of the center |
| r | radius |
| fill | Fill color name or HTML RGB notation |
| stroke | Stroke/Outline color name or HTML RGB notation |
| stroke-width | The width in pixels of the outline |

- Change the colors of the
strokeandstroke-width. - Add a few lines to the image. MDN Docs about the line element.
- Create a face with the basic elements.
D3
To make interactive visualzations, we have to use JavaScript to modify elements on the page. To simplify our lives, we'll use D3 to find specific elements and modify them. D3 uses a namespace like notation to hide all of its functionality. For example, all d3 functions begin with "d3". One of the first functions we'll find is select so to access this d3 function to help you find specific elements, we use d3.select. For example, d3.select('circle') will find the circle you just created. If you click on the Console button at the top right, you can enter d3.select('circle') for testing, and you should see a lot of information displayed on the screen.
Finding specific elements
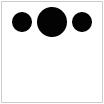
Let's say you have 3 circles, and you only want to modify the middle one. How do you do that? The simplest way to do this is to add a special attribute called id to the 2nd circle. The value you give it is a string, and it must be unique in the entire document.
<circle cx="20" cy="20" r="10" />
<circle cx="50" cy="20" r="10" id="middle-circle"/>
<circle cx="80" cy="20" r="10" />
In D3, you select this specific element by using this id in the select statement. To tell D3 we're trying to find an element with a specific id we prefix the name with a hash symbol (#). So in this example, we'd use:
d3.select("#middle-circle");
d3.select returns what is called a selection. This gives us the first element that matches the filter you give it as an argument. In the above example, we used #middle-circle which matches the circle with the id value of "middle-circle".
Selecting all filtered elements
If you want to select more than one element, you can use the d3.selectAll function instead. For example, to select all circles we would use:
d3.selectAll("circle");
Changing attributes
One of the key things we'll be doing with D3 is setting and changing the attributes of these elements. For example, when editing or creating a circle element, we need to set the position attributes (cx and cy) as well as the radius (r). When making things interactive, you might simply want to change a value or add a new one. For example, if you want to set the color of the middle circle from the previous example, you would do:
d3.select("#middle-circle").style("fill", "red");
Interactivity
Now, let's change the elements when they're clicked. The following example has some code provided, and you need to add code to change the radius of the circle when clicked. The attribute for this is r and you can change the size to 15. To change an attribute in d3, you use the attr function on a selection.

- Move the circles when clicked.
- Set/remove the
stroke(border) color on themouseenterandmouseoutevents. - Change the radius back when clicked a second time.